How to use a front tine tiller

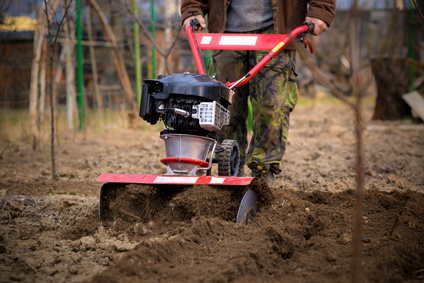
Using a mechanical front tine tiller can be a very time saving and efficient way to cultivate your soil, renew your plot or even assist in starting a vegetable patch or flower bed from scratch. These powerful machines are designed to make a back-challenging job easier and faster. You can learn more about the actual machines on these pages, but this article is aimed at you as an owner and is intended to be a simple guide to using your tiller effectively.
1. Make absolutely sure the patch of ground is clear of large stones, roots, branches or anything else that might cause damage to your tiller. Then a good rake, scrape and check for medium-sized or smaller stones and debris will make sure you are clear. All this could save time and money.
2. Wear sensible, hard-wearing clothing. At the very least wear sturdy shoes or boots, preferably steel toe-capped, and good quality gardening or riggers gloves. Also, we thoroughly recommend wearing goggles or eye defenders of some sort, as small stones and earth can be thrown around and you really don’t want to be hit in the eye by flying debris.
3. Make sure you mark out your tilling area in advance unless it is very obvious. If your area is oblong, do your tilling in stripes down the longest route, starting in one corb=ner and working your way up and down to the opposite corner.
4. Plan your cultivating depth. Most front tine tillers will have an adjustable working depth facility and will usually feature a depth gauge that helps you keep to your tilling depth as you work your plot, so make sure you set this correctly.
5. Starting your tiller depends on the type of machine you have. We are assuming you are using a petrol front tine tiller, with a 4-stroke engine, then it is pretty much like starting a 4-stroke engine lawnmower.
Engage the choke, open up the throttle to midway and then pull firmly and sharply on the recoil rope or handle. Once started, the choke lever or handle should be returned to the open position. Let the engine run a cycle or two before moving off. Then open up the throttle to speed up the motor and engage the tines.
N.B. Remember to keep control and maintain a very firm hold on your handles at this juncture. You should expect the tiller to move forward sharply so you will need to rein it in a little.
With a battery-powered tiller or an electric mains powered tiller, it is mainly a case of switching the power on and then engaging the tines. However, the above note regarding a good grip and control still applies!
6. Allow the tiller to move forward. Be aware that there will be a certain amount of jerking back and forth as the machine deals with heavy clumps of soil. If the machine gets stuck, move it from side to side as you also try to move forward.
Some tillers have a reverse gear, this is useful if you need to back out and go forward again, and also for getting right up to the ends of rows.
7. Don’t just take one pass over the garden. Your soil will benefit from being turned several times so try to make a number of passes in different directions. This will help your later efforts of raking and preparation much easier, as the finer the tilth, the easier the work is and the better condition your soil is in.
8. When you have finished, and the machine is safely turned off, do remember to clean your tiller. Mud and organic debris around the tines or engine can lead to corrosion and permanent damage. Store your tiller somewhere dry and safe.
Please visit these pages if you want to see the range of tillers, cultivators and rotavators we stock.
And if you need further help on these machines, or anything else, do call us on 0345 4588 905 (9am-5pm Mon-Fri & 10am-4pm Sat) and one of our friendly product experts will be very happy to give you impartial advice.
‘Have now used them twice, advice and service were excellent’ J. Field (TRUSTPILOT)