How to make your shed weatherproof
Whatever the weather people say, (we’re talking to you Michael Fish), you can be sure that at some point in the year we are going to have a proper cats and dogs style downpour. This is, after all, the temperate climate of the UK and we are used to at least a few major soaks at whatever time of year they decide to visit us.
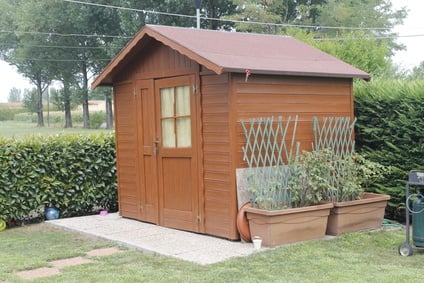
Good for the garden, good for the lawn, good for the ducks but not so good for your precious shed. Be it a storeroom, a workroom, a shelter, a tea room, a haven from the family, a napping place or just a home for the trusty mower, your shed is important. So don’t let it suffer and rot under the impact of the weather, make it weatherproof.
If your shed was ready-made, and it’s a good one, it was quite probably weatherproofed when you bought it, and no doubt if you built one from scratch from old pieces or even a kit, you made sure it was protected. But how old is it? How many seasons of rain, snow, sleet and forst have landed on it? No weatherproofing lasts forever. Bought from a DIY store, in kit form, whole or made from old bits, you can see to it that it lasts that bit longer with some work, some time and some TLC.
So. Here are a few weatherproofing tips to make sure your shed goes the distance. This is probably a job to do before winter, so your shed manages to survive the cold and damp months.
1. Hopefully, when you erected your shed, you created either a hard standing or a gap between the floor and the ground, otherwise, it is very hard to stop water or damp creeping in from below. If you didn’t do this before putting up the shed, consider raising your shed in some way. Perhaps on four evenly spaced waterproofed timbers, like joists beneath the shed, covered with a polyethene sheet and raising the shed just a few inches off the ground. These could be set in concrete or fixed together at each end creating a frame to stop them slipping in some other way.
2. Check for holes and cracks. Go over the whole structure and if you can see light through anything but the windows, you have some work to do. Pay special attention to the fittings of the windows (if you have any) the joints, corners and places where the roof meets the walls. look for wet or damp patches.
If your shed is a home-made Frankenstein’s monster job (like mine) look at all the places where different woods have been used. You can patch any holes with new or reclaimed wood. since, as it is made of old bits anyway as you will hardly notice the difference. If your shed is too pretty to patch, you can use some kind of sealant or wood filler to plug gaps and fill holes. You can, of course, use a mixture of both these things just to make sure.
3. If the roof is covered with roofing felt or another roofing material, check it has not been damaged and perhaps add a few more roof tacks to make sure the wind when it comes, does no damage. If it is tiled, check all the overlaps.
4. Make sure your roofing felt or material comes right out over the edge of the shed and there is no curve where water can run down the roof, around and into the walls, or drip directly onto them as this will eventually rot the wood. Preferably fix up some guttering and a water butt. This also means you will have a ready supply of water for your garden.
5. When you have checked and filled or patched any holes, you need to paint the whole shed with some kind of waterproof protective timber treatment. Oil-based treatments will sink into the wood, protecting from inside the wood as well. Make sure you do this on a dry day so the integrity of the treatment is maintained.
6. After this has dried, think about painting the shed with a waterproof paint for extra protection.
All this should ensure your shed survives a few more rainy seasons.